Yoga is commonly associated with stretching and relaxation, but it is also a powerful way to train the entire body. When practiced mindfully, yoga builds strength, balance, and endurance while improving flexibility and focus. No matter your experience level, adding these six essential yoga poses to your routine can deliver a complete full-body workout that activates major muscle groups and supports overall fitness.
Each of these poses blends strength, mobility, and stability, making them ideal for a balanced yoga practice. Together, they target the core, arms, legs, and back while enhancing circulation, posture, and mental clarity. Practicing them consistently helps develop both physical strength and inner awareness.

1. Downward-Facing Dog (Adho Mukha Svanasana)
Downward-Facing Dog is a basic yoga pose that stretches your whole body & makes your arms, shoulders, legs, and core stronger. Since your head goes below your heart in this position it helps blood flow toward your brain which makes you feel more alert & energized.

# How to Practice Downward-Facing Dog

Start on your hands & knees with your wrists directly under your shoulders and your knees under your hips. Spread your fingers wide and press firmly through your palms & knuckles. Tuck your toes under and lift your knees off the floor. Begin to straighten your legs and lift your hips up and back. Your body should form an inverted V shape. Keep your feet hip-width apart and parallel to each other. Press your heels toward the floor but don’t worry if they don’t touch. Engage your quadriceps to help straighten your legs. Rotate your upper arms outward to broaden your shoulder blades across your back. Draw your shoulder blades down your back toward your tailbone. Keep your head between your upper arms and avoid hanging it down. Gaze toward your navel or between your legs. Hold the pose for five to ten breaths while maintaining steady breathing. To release the pose bend your knees and lower them back to the floor. Rest in Child’s Pose for a few breaths before continuing your practice. This foundational yoga pose stretches your hamstrings and calves while strengthening your arms and legs. It also helps calm your mind and energize your body. Regular practice improves your overall flexibility and builds upper body strength.
– Begin on all fours with wrists aligned under shoulders and knees under hips.
– Curl your toes under and lift your hips upward, forming an inverted “V” shape.
Straighten your legs as much as feels comfortable and gently push your heels down toward the floor.
– Maintain steady breathing and hold for 30 seconds to 1 minute.
This pose lengthens the hamstrings, calves, and spine while strengthening the upper body and core, making it an ideal posture to warm up and energize the body.
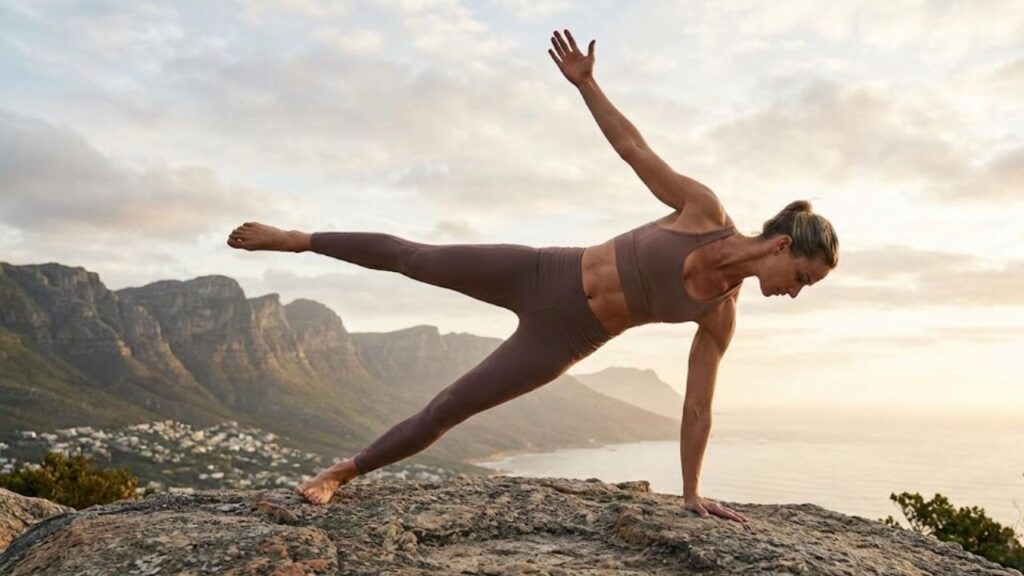
2. Warrior II (Virabhadrasana II)
Warrior II is a powerful standing position that strengthens the legs & hips while enhancing balance and endurance. This pose also improves flexibility in the groin area and expands the chest and shoulders.
# How to Practice Warrior II
Start by standing at the front of your yoga mat with your feet together. Step your left foot back about three to four feet. The exact distance depends on your height and comfort level. Turn your left foot out at a slight angle of about 45 degrees. Your right foot should point straight forward toward the front of your mat. Make sure your right heel lines up with the arch of your left foot. Bend your right knee until it stacks directly over your right ankle. Your thigh should be parallel to the floor if possible. Keep your left leg straight and strong by pressing firmly through the outer edge of your left foot. Raise both arms to shoulder height and extend them out to the sides. Your arms should form one straight line with your palms facing down. Reach actively through your fingertips in opposite directions. Turn your head to gaze over your right fingertips. Keep your shoulders relaxed and away from your ears. Your torso should face the long edge of your mat rather than turning toward your front leg. Press down through both feet evenly. Draw your belly button gently toward your spine to engage your core. Keep your chest open and your shoulder blades sliding down your back. Hold this position for five to ten breaths. To come out of the pose straighten your front leg and lower your arms. Step your back foot forward to meet your front foot. Repeat the same steps on the opposite side with your left leg forward.
Stand with your feet positioned wide apart at a distance of approximately 3 to 4 feet. To begin this stance you need to place your feet wider than your normal standing position. The spacing should measure around 3 to 4 feet between your feet. This wide base creates stability and balance for the exercise or pose you are about to perform. Make sure both feet are firmly planted on the ground. Your weight should distribute evenly across both legs. Keep your toes pointing forward or slightly outward depending on what feels most comfortable for your body. This wide stance forms the foundation for many strength training exercises and yoga positions. Check that the distance feels natural & sustainable. If the stance feels too wide you can adjust by bringing your feet slightly closer together. If it feels too narrow you can step out a bit further. The goal is to find a width that allows you to maintain good form while feeling stable and grounded.
Turn your right foot so it points outward. Then bend your right knee until it is directly above your ankle.
Extend your arms to shoulder height with your palms pointing toward the floor and direct your gaze past your right fingertips.
– Hold for 30 seconds to 1 minute, then repeat on the opposite side.
This pose strengthens the thighs, hips, and core while boosting endurance and stability, making it essential for a full-body routine.
3. Plank Pose (Phalakasana)
Plank Pose is a core-focused posture that builds strength in the arms, shoulders, and abdominal muscles while improving overall body control and endurance.
# How to Practice Plank Pose
Start by positioning yourself on your hands and knees on a yoga mat or comfortable surface. Place your hands directly under your shoulders with your fingers spread wide for better stability. Your wrists should form a straight line with your shoulders. Step your feet back one at a time until your body forms a straight line from your head to your heels. Your legs should be fully extended with your toes tucked under. Keep your feet about hip-width apart for balance. Engage your core muscles by pulling your belly button toward your spine. This helps protect your lower back and maintains proper form. Your body should look like a straight plank of wood without any sagging or lifting of your hips. Keep your neck in a neutral position by looking down at the floor about a foot in front of your hands. Avoid dropping your head or looking forward as this can strain your neck. Your ears should align with your shoulders. Press firmly through your hands and spread your shoulder blades wide across your back. This creates stability in your upper body. Make sure your shoulders stay directly over your wrists throughout the pose. Breathe steadily and naturally while holding the position. Many beginners hold their breath but this reduces the effectiveness of the pose. Start by holding the plank for 20 to 30 seconds and gradually increase the duration as you build strength. If the full plank feels too challenging you can modify it by dropping your knees to the ground. This reduces the amount of body weight you need to support while still engaging your core muscles. Keep everything else the same with your hands under your shoulders and your body in a straight line from your head to your knees. Common mistakes include letting your hips drop toward the floor or lifting them too high in the air. Both positions reduce the effectiveness of the exercise & can cause strain. Check your form regularly or practice in front of a mirror.
– Start on hands and knees, then step your feet back until your body forms a straight line.
Keep your hands positioned right under your shoulders and tighten your core muscles.
– Hold the position for 20–30 seconds or longer while breathing evenly.

Plank works your core muscles along with your arms, shoulders & legs all at the same time. This makes it one of the best exercises you can do to build strength throughout your entire body.
4. Chair Pose (Utkatasana)
Chair Pose is a dynamic posture that targets the legs, glutes, and core while challenging balance and posture. It mimics the action of sitting, which deeply engages the lower body.
# How to Practice Chair Pose
Chair Pose is a standing yoga posture that builds strength in your legs and core while improving your balance and focus. Here is how to do it correctly. Start by standing with your feet together or hip-width apart on your yoga mat. Keep your arms relaxed at your sides and take a moment to find your balance. Make sure your weight is evenly distributed across both feet. Begin the pose by bending your knees and lowering your hips as if you are sitting down in an invisible chair. Keep your knees aligned over your ankles and avoid letting them push forward past your toes. Your thighs should aim to become parallel to the floor but only go as low as feels comfortable for your body. As you sink into the pose raise both arms overhead with your palms facing each other. Keep your shoulders relaxed and away from your ears. Your arms should be straight but not locked at the elbows. You can also bring your palms together if that feels better for your shoulders. Focus on keeping your spine long & your chest lifted. Draw your belly button toward your spine to engage your core muscles. This helps protect your lower back and keeps you stable in the pose. Your weight should rest primarily in your heels rather than your toes. Hold the position for five to ten breaths or longer if you feel comfortable. Keep breathing steadily throughout the pose. When you are ready to release slowly straighten your legs and lower your arms back down to your sides. Chair Pose strengthens your quadriceps & glutes while also working your ankles and calves. It teaches you how to maintain proper alignment and builds the endurance needed for other yoga poses. Practice this pose regularly to see improvements in your leg strength and overall stability.
– Stand tall with feet hip-width apart.
Lower yourself by bending your knees & pushing your hips backward like you are about to sit down on a chair.
Lift your arms above your head while making sure your chest stays up and your core muscles remain tight.
– Hold for 30 seconds to 1 minute with steady breathing.
This pose builds strength in the quadriceps muscles along with the glutes and calves. It also works the core muscles while improving your balance and endurance.
5. Cobra Pose (Bhujangasana)
Cobra Pose is a gentle backbend that strengthens the spine and lower back while opening the chest and shoulders. It is especially beneficial for counteracting long hours of sitting.
How to practice Cobra Pose:
Lie face down with your legs stretched out and your feet pushing against the mat.
– Place hands under shoulders and gently lift the chest using the back muscles.
Keep your elbows slightly bent and concentrate on making your spine longer.
Hold the position for 20 to 30 seconds and then slowly release.
Cobra Pose helps your spine move more freely while making your back muscles stronger. This yoga position also supports better posture and helps you breathe more effectively. When you practice this pose regularly you can reduce stiffness in your spine and build strength in the muscles that support your back. The gentle backbend opens up your chest area which allows your lungs to expand more fully with each breath. This makes Cobra Pose useful for people who spend long hours sitting or working at a desk.
6. Bridge Pose (Setu Bandhasana)
Bridge Pose is a supportive backbend that strengthens the glutes, hamstrings, and lower back while opening the chest and shoulders. It also helps relieve tension in the spine.
How to practice Bridge Pose:
Lie on your back and bend your knees while keeping your feet flat on the floor. Position your feet so they are hip-width apart.
Press down through your feet & raise your hips up while tightening your glutes & core muscles.
Keep your arms next to your body with your palms facing down.
Hold this position for 30 seconds to 1 minute while breathing in a relaxed way.
 Hang it by the shower: the clever bathroom hack that eliminates moisture and keeps your space fresh
Bridge Pose supports spinal health, strengthens the lower body, and improves flexibility in the chest and hips.